
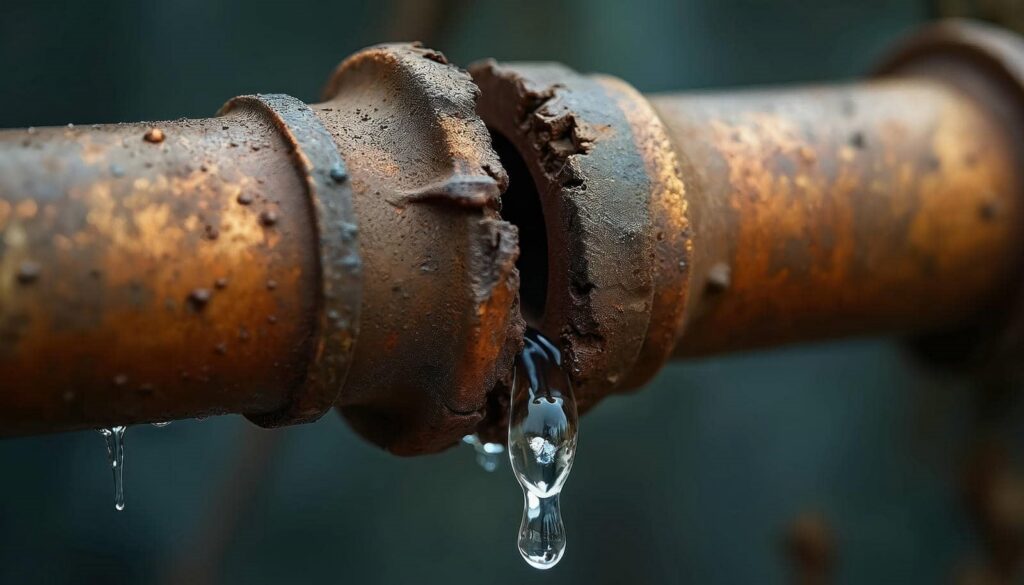
When dealing with a burst pipe, prompt action is essential to minimize further burst pipe damage. You’ll need to assess safety risks, gather necessary tools, and follow a systematic approach for cleanup. Each step plays an important role in ensuring your property is restored effectively. Understanding these procedures can save you time and reduce the risk of mold growth later on.
Key Takeaways
- Gather personal protective equipment (PPE) like gloves and goggles before starting the cleanup process.
- Identify and document the source of the leak and affected areas, noting any visible damage.
- Remove standing water using a wet/dry vacuum or industrial pumps to prevent further damage.
- Dry and dehumidify the affected areas with fans and dehumidifiers, focusing on hidden moisture pockets.
- Inspect for mold growth and use appropriate cleaners to prevent future issues.
Safety Precautions Before Cleanup
Before you begin cleaning up after a burst pipe, it’s essential to prioritize safety. First, gather your personal protective equipment (PPE), including gloves, goggles, and waterproof boots. These items shield you from contaminants and potential hazards.
Next, verify your emergency contacts are readily accessible; this includes local plumbers or restoration services that can assist if the situation escalates. If the water is contaminated, avoid direct contact and consider shutting off your electricity to prevent electrical hazards.
Always assess the area for structural damage before entering, and if you’re unsure, don’t hesitate to call for professional help. By taking these precautions, you create a safer environment for yourself and those around you.
How to Quickly Assess Damage From a Burst Pipe?
Once you’ve ensured a safe environment, you can begin evaluating the damage from a burst pipe efficiently.
Start your damage assessment by identifying the source of the leak and the areas affected. Look for visible signs of water damage, such as discoloration, warping, or mold growth.
Check walls, floors, and ceilings thoroughly; these areas often absorb moisture quickly. Document your findings with photos and notes to maintain a clear record of the damage.
Be sure to inspect any nearby electrical systems and appliances, as water exposure can pose serious risks.
Finally, determine the extent of the damage to prioritize your cleanup efforts effectively. This systematic approach will help you address the situation confidently and swiftly.
Gathering the Right Cleaning Supplies for Burst Pipe Damage
Gathering the right cleaning supplies is essential for effectively addressing burst pipe damage. You’ll need specific cleaning tools to ensure a thorough cleanup and facilitate damage assessment. Here’s a quick overview of what you should have on hand:
| Cleaning Tool | Purpose | Emotional Impact |
|---|---|---|
| Wet/Dry Vacuum | Removes standing water | Relief from chaos |
| Mold Cleaner | Prevents mold growth | Sense of safety |
| Mop and Bucket | Cleans flooring | Restores normalcy |
| Gloves | Protects hands | Confidence in safety |
| Fans/Dehumidifiers | Reduces moisture levels | Peace of mind |
Having the right supplies helps you feel prepared and connected to others dealing with similar challenges.
Steps for Removing Standing Water
To effectively remove standing water, start by evaluating the water levels in the affected area.
This step will help you determine the appropriate equipment needed for efficient extraction.
Once you know the extent of the water, you can select the right tools for the job.
Assess Water Levels
As you prepare to remove standing water from a burst pipe, it’s essential to assess water levels thoroughly. A proper water level assessment ensures you understand the extent of the damage and helps in formulating an effective flood impact analysis.
Here’s what you need to take into account:
- Identify areas with the highest water accumulation.
- Measure water depth to determine potential hazards.
- Check for hidden pockets of water that may cause mold growth.
- Evaluate the surrounding environment for structural integrity.
Use Appropriate Equipment
When tackling standing water from a burst pipe, using the right equipment is essential for efficient removal and damage mitigation.
Start with a wet/dry vacuum; it’s one of the most effective cleaning tools for sucking up large volumes of water. If the area is extensive, consider industrial pumps to expedite the process.
For smaller spaces, mops and buckets can help collect residual water. Don’t forget about moisture meters to check hidden water pockets.
Additionally, fans and dehumidifiers are crucial equipment types for drying out the affected area and preventing mold growth.
Always prioritize safety by wearing protective gear and ensuring power sources are secure.
With the right tools and techniques, you’ll restore your space effectively.
How to Dry and Dehumidify Affected Areas
Effective drying and dehumidifying of areas affected by burst pipe damage is essential to prevent mold growth and structural issues. Start by employing effective dehumidification techniques to reduce moisture levels.
Use fans to enhance air circulation, promoting quicker drying.
- Open windows and doors to increase ventilation.
- Utilize dehumidifiers to extract excess moisture from the air.
- Monitor humidity levels with a hygrometer to track progress.
- Focus on hidden areas, like behind walls and under floors, where moisture can linger.
Effective Techniques for Cleaning and Sanitizing Surfaces Post-Water Damage
Cleaning and sanitizing surfaces after water damage is essential to restore your space and prevent health hazards.
Start with a thorough cleaning using appropriate cleaning techniques, such as scrubbing surfaces with a mixture of detergent and warm water. This helps remove dirt and contaminants.
For effective surface sanitization, use a disinfectant approved for water damage situations. Make sure you follow the manufacturer’s instructions for proper dilution and contact time.
Pay special attention to porous materials, as they may harbor bacteria. After cleaning, rinse surfaces with clean water to remove any residue.
Finally, allow everything to dry completely to minimize further issues. By following these steps, you’ll create a safer, healthier environment for yourself and your loved ones.
How to Prevent and Treat Mold After Water Damage?
After thoroughly cleaning and sanitizing surfaces, it’s important to address mold prevention and treatment, as excess moisture can lead to rapid mold growth.
Here are key steps to ensure your space remains mold-free:
Control humidity: Keep indoor humidity below 60% using dehumidifiers and proper ventilation.
Inspect regularly: Check for leaks or water accumulation in hidden areas like basements and behind walls.
Use mold-resistant products: Apply mold-resistant paint and materials during repairs to reduce future risk.
Act quickly: If you spot mold, treat it immediately with a mixture of water and detergent or a commercial mold remover.
Understanding Insurance Claims for Burst Pipe Damage
When a burst pipe causes significant damage, understanding your insurance coverage can make an important difference in recovery efforts.
First, review your policy to identify what types of water damage are covered. Most homeowners’ insurance includes burst pipe damage, but specifics may vary.
Document all damage with photos and notes, as this will support your claim.
Reach out to your insurance provider to initiate the claim process; they’ll guide you through necessary forms and assessments.
Be prepared to provide repair estimates from professionals.
Timely communication with your insurer is vital, as delays can impact your claim approval.
Knowing your coverage details empowers you to navigate this challenging situation effectively and ensures a smoother recovery journey.
Frequently Asked Questions
Can I Clean Burst Pipe Damage on My Own?
Yes, you can clean burst pipe damage on your own. Start with water extraction to prevent mold growth, then proceed with pipe repair. Make certain you have proper tools and safety gear for effective results.
How Long Does It Take for Mold to Grow After Water Damage?
Mold can start growing within 24 to 48 hours after water damage. To prevent mold, ensure you dry affected areas quickly and maintain proper ventilation, reducing moisture levels and minimizing the risk of mold proliferation.
What Should I Do if I Smell Mold?
If you smell mold, act fast! Use mold identification techniques to pinpoint the source. Ignoring it could lead to serious health risks. Don’t let it linger—your well-being and home deserve immediate attention!
Are There Special Tools Needed for Cleaning Burst Pipe Damage?
You’ll need specific tools for effective pipe repair and water extraction. A wet/dry vacuum, moisture meter, and dehumidifier are essential to ensure thorough cleaning and prevent mold growth after addressing burst pipe issues.
Will My Insurance Cover the Cost of Repairs?
Your insurance policy likely covers burst pipe repairs, but review your specific terms. Initiate the claim process promptly, documenting damages and expenses, to ensure you receive the coverage you’re entitled to without unnecessary delays.
Review
In tackling burst pipe damage, think of your home as a garden after a storm. Just as a gardener must remove debris and nurture the soil for new growth, you need to act swiftly and thoroughly to restore your space. By following these steps, you mitigate immediate damage and safeguard against future issues like mold. Remember, a proactive approach today can prevent a more costly and labor-intensive cleanup tomorrow.