
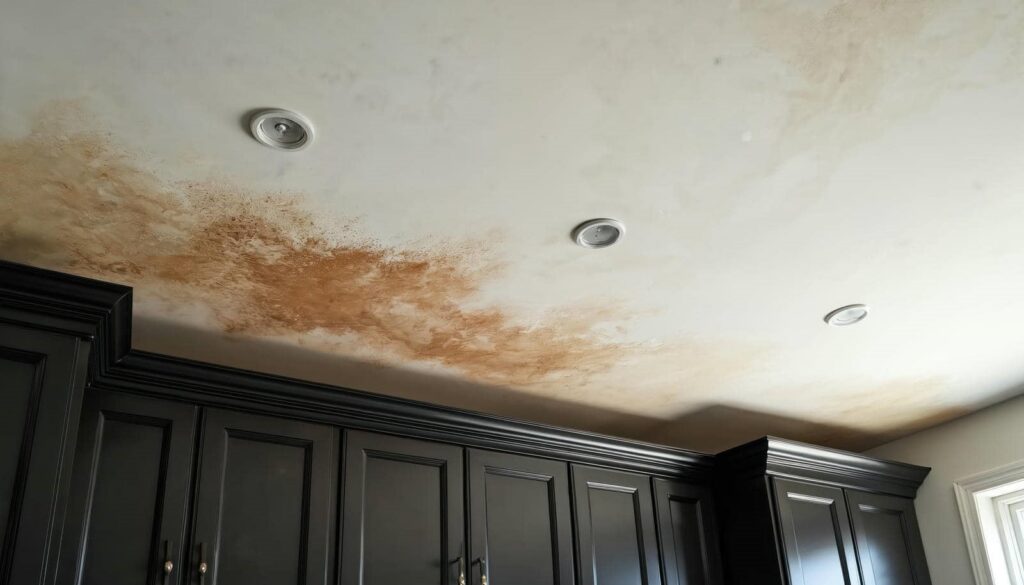
Many homeowners face some form of water damage, and ceiling leaks can turn minor trouble into a costly repair fast. You need to stop the source, check the full extent, and dry the area before mold sets in. From there, you’ll know when to remove damaged drywall, when to patch, and when a repaint will actually hold up. The next steps matter more than you might think.
Key Takeaways
- Stop the leak immediately by shutting off water and protecting furniture, floors, and electronics from further damage.
- Inspect the ceiling for stains, sagging, bubbling paint, soft spots, and hidden spread beyond visible water marks.
- Dry the area fast with fans, a dehumidifier, and good ventilation to reduce moisture and prevent mold growth.
- Remove any wet or damaged drywall and insulation, using safety gear and bagging debris right away.
- Patch the ceiling with new drywall, then sand, prime, and repaint for a smooth, finished repair.
Stop the Leak and Protect the Room
Before you do anything else, stop the leak at its source and protect the room below. You need fast leak detection, so check plumbing joints, roof penetrations, HVAC lines, and nearby fixtures.
Shut off the water supply if you can’t isolate the failure right away. If the source is active above a finished space, place a bucket or pan under the drip path and redirect flow with plastic sheeting or a towel wick.
For room protection, move furniture, electronics, and rugs out of the impact zone. Cover anything left behind with waterproof sheeting.
Open a window or run a fan only if it won’t spread moisture. Stay methodical, work as a team if someone’s helping you, and keep the area safe until the source is controlled.
Assess the Ceiling Water Damage
Once the leak is controlled, inspect the ceiling damage right away to gauge how severe it is. You’re looking for stains, sagging, bubbling paint, and any soft spots that may signal compromised drywall or plaster.
Check the affected area’s edges, because water often spreads beyond the visible mark. Document everything with clear photos and brief notes for insurance claims. If you see dark spots or a musty smell, flag it for mold prevention and plan to address it promptly.
- Press gently to test for softness
- Measure the stained area and mark boundaries
- Note any cracks, drips, or discoloration
This quick assessment helps you decide whether the damage is minor or needs professional help, and it keeps your next repair steps organized and manageable.
Dry the Ceiling Quickly
After you’ve assessed the damage, move fast to dry the ceiling and limit further deterioration. Shut off the source if it’s still active, then use fans to boost air circulation and a dehumidifier to support moisture control.
Keep windows open only if outside air is drier than indoor air; otherwise, seal the room and let equipment work. Position a box fan to move air across the affected surface, not directly into it, so you don’t spread debris.
Check the ceiling every few hours for soft spots, staining, or new sagging. If you have a moisture meter, track readings until they drop to normal.
Stay patient and consistent; quick, steady drying gives your space the best chance to recover cleanly.
Remove Damaged Drywall and Insulation
Cut out any drywall that’s soft, swollen, cracked, or stained, since compromised material won’t dry properly and can hide mold growth. Use controlled demolition techniques to open the ceiling only as far as the damage extends, then remove wet insulation with gloved hands or a bagged scraper.
Keep your team aligned by marking boundaries before you cut.
- Wear eye protection, gloves, and a respirator.
- Shut off power near the work area first.
- Bag debris immediately to reduce contamination.
Work methodically so you don’t tear adjacent drywall or disturb clean framing. Follow basic safety precautions when handling overhead material, because falling fragments and dust can injure you fast.
When you clear the cavity, you’re creating a cleaner, safer path for the next repair step.
Patch, Sand, and Repaint the Ceiling
With the damaged materials removed, fill the opening with new drywall cut to fit the ceiling joists. Then tape the seams and apply joint compound in thin, even coats.
Let each coat dry fully before you sand it smooth with fine-grit paper. Check for ridges, pinholes, and edges that need another skim coat. Once the repair feels flush, prime the patched area so the ceiling materials absorb finish paint evenly.
Match your existing paint types by testing a small sample in daylight, then roll on two light coats for a clean blend. You can do this neatly and confidently; careful prep helps your ceiling look like it was never damaged.
Remove dust before painting, and keep your strokes consistent to avoid flashing or texture mismatch.
Frequently Asked Questions
What Causes Ceiling Water Damage Stains to Return After Repairs?
You’re seeing return stains because you haven’t fully fixed the source leak or dried hidden moisture. Use leak detection, repair plumbing or roof issues, then apply stain prevention primer. You’ll keep your ceiling looking clean.
How Do I Know if Mold Is Hidden Inside the Ceiling?
You can spot hidden mold during a ceiling inspection by checking for musty odors, discoloration, sagging, or soft drywall. Use mold detection tools or a professional test if you’re unsure; you’ll protect your home and community.
Can I Repair Textured Ceilings Without Matching the Pattern?
Yes, you can repair textured ceilings without matching the pattern. You’ve got options: textured ceiling repair with knockdown, smooth skim, or pattern alternatives. Don’t reinvent the wheel—choose a uniform finish, then prime and paint.
Should I Call Insurance Before Starting Ceiling Repairs?
Yes—call your insurer first. You’ll confirm insurance coverage, document damage, and avoid jeopardizing claims. Then you can estimate repair costs, protect your home, and join others who handle ceiling repairs the right way.
How Long Should I Wait Before Repainting a Repaired Ceiling?
Wait at least 48 to 72 hours after repairs, but you should verify complete drying time first. Some repaint failures come from trapped moisture. Use stain-blocking paint types, and you’ll match the pros.
Summary
Ceiling water damage can feel inconvenient, but it’s helpful in one odd way: it quickly shows you where your repair priorities are. Stop the leak first, or you’ll just be repainting a problem. Then assess, dry, remove damaged material, and finish the repair with patching, sanding, and repainting. If you document each step, you’ll also make the insurance process less painful. Do the work now, and you won’t invite a bigger mess later.