
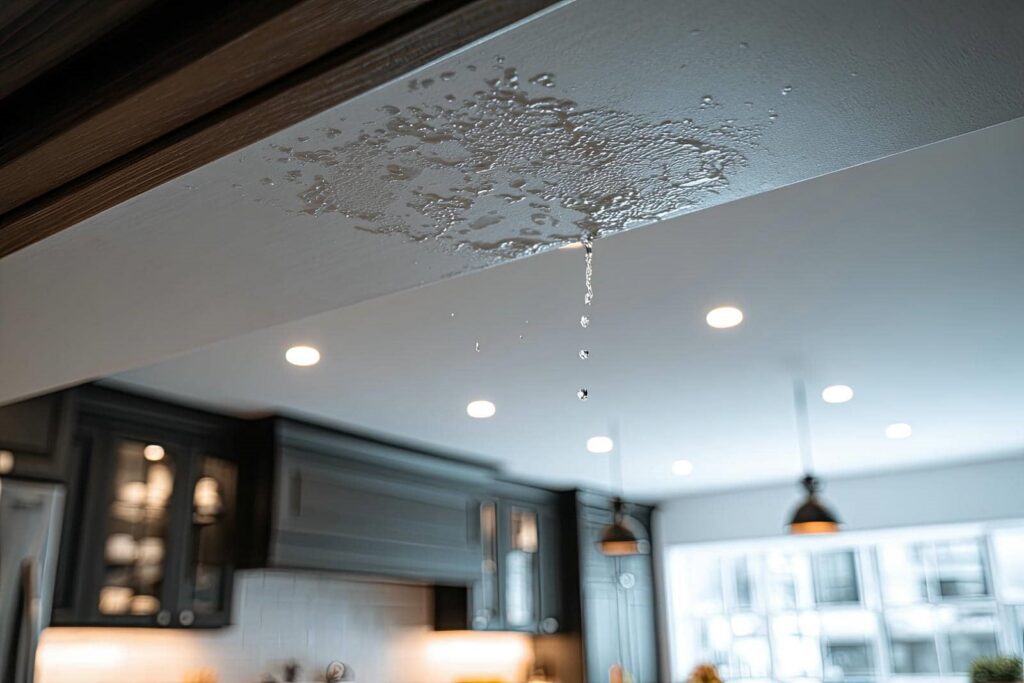
Ceiling water damage repair services help you identify the leak source, assess hidden damage, and restore affected materials before the problem spreads. You’ll usually deal with moisture testing, leak tracing, drying, demolition of damaged drywall or insulation, and repairs that prevent mold and structural issues. The scope can vary widely, and the final cost often depends on how far the water has traveled and what needs replacement.
Key Takeaways
- Ceiling water damage repair services locate the leak source and assess moisture damage to drywall, plaster, insulation, paint, and framing.
- They use tools like moisture meters, infrared imaging, dye tests, and inspection cameras to find hidden water intrusion.
- Repair crews remove damaged materials, dry affected areas, and replace compromised drywall, insulation, and other building components.
- Services also include cleaning stains, priming, repainting, and matching texture and finish for a seamless restoration.
- Many providers document damage, estimate costs, and support insurance claims with clear line-item repair plans.
What Ceiling Water Damage Repair Covers
Ceiling water damage repair covers the full process of identifying the leak source, evaluating the extent of moisture intrusion, and restoring the affected ceiling assembly to a safe, stable condition.
You get a structured assessment of damage to ceiling materials, including drywall, plaster, insulation, paint, and framing. Technicians remove compromised sections, dry hidden cavities, and stabilize surfaces to prevent sagging, staining, and microbial growth.
They then replace damaged components, tape, texture, prime, and repaint to match adjacent finishes. You also receive documentation that supports insurance claims, including moisture readings, photos, and repair notes.
This process helps you return your space to code-compliant condition with minimal disruption, so you can feel confident your ceiling’s integrity and appearance are back where they belong.
How Pros Find the Leak Source
When you inspect ceiling water damage, you should first trace common leak sources like roof penetrations, plumbing lines, HVAC condensate, and damaged flashing.
Pros use leak detection methods such as moisture meters, infrared imaging, and targeted water testing to isolate the entry point without unnecessary demolition.
Common Leak Sources
Even a small ceiling stain can trace back to several likely leak sources, so pros start by narrowing the path the water took before it reached the drywall.
In your home, the most common culprits are roof leaks, plumbing issues, and failed flashing around vents, chimneys, or skylights. You’ll also see trouble from condensate lines, overflowing HVAC pans, and bathroom fixtures above the affected room.
A skilled technician checks whether the damage pattern points to gravity, pressure, or intermittent seepage, because each one behaves differently. You’re not guessing here; you’re building a clear repair plan that fits your home’s structure.
Leak Detection Methods
Once the likely leak sources are narrowed down, pros move into direct leak detection to confirm exactly where water is entering and how far it has traveled. You’ll see them pair visual tracing with targeted testing so your ceiling repair stays accurate.
- thermal imaging reveals cool, wet zones behind finishes
- moisture meters measure hidden saturation levels precisely
- pressure tests expose plumbing leaks under load
- dye tests confirm drainage or roof entry paths
- inspection cameras verify cavities without unnecessary demolition
They document readings, map spread patterns, and compare active leaks against old stains. That lets you know the repair plan isn’t guesswork—it’s evidence-based.
With this approach, you’re working with a team that spots the source fast, protects adjacent materials, and prepares the ceiling for a durable, clean restoration.
What Happens During Ceiling Water Damage Repair
During ceiling water damage repair, a technician first inspects the affected area to identify the source of the leak, assess the extent of saturation, and determine whether structural components or insulation have been compromised.
You’ll then see targeted drying with dehumidifiers and air movers to lower moisture levels and stabilize the ceiling assembly.
Next, the team cleans the surface, performs water stain removal, and treats any visible contamination so the finish won’t telegraph damage later.
If you’re in a shared building, they’ll coordinate with you to keep the work zone contained and predictable.
After drying, they document readings, confirm the substrate is sound, and begin ceiling restoration with patching, sealing, and texture matching.
Finally, they verify the repair, so your space looks consistent and performs reliably.
When Drywall, Insulation, and Paint Must Be Replaced
You’ll need drywall replacement when staining, sagging, crumbling edges, or softened seams show that the board has lost structural integrity.
If insulation stays wet, compressed, or mold-contaminated, you should remove and replace it because it can hold moisture and reduce thermal performance.
After the substrate is dry and stable, you’ll repaint with a primer and finish coat to restore protection and match the repaired ceiling.
Drywall Replacement Signs
If ceiling water damage has soaked drywall long enough to compromise its structure, replacement is usually the safest option rather than repair.
You should inspect the drywall condition after every moisture assessment, because hidden swelling can spread beyond the stain.
Watch for:
- sagging or bowing panels
- soft, crumbly surfaces
- tape separation at seams
- persistent staining after drying
- fastener rust or blistering paint
When you see these signs, you’re likely dealing with material that can’t regain strength.
Your crew should remove affected sections, cut back to sound edges, and install new drywall for a stable finish.
That approach helps you protect your home and stay confident in the repair process.
Insulation Moisture Damage
When ceiling leaks reach the cavity above the drywall, the insulation can trap moisture and lose both thermal performance and structural integrity.
You may need full removal when fiberglass sags, cellulose mats, or mineral wool stays damp after drying efforts. Wet insulation can hold hidden contaminants and reduce moisture control across the ceiling assembly, so you should verify the source first and stop it before repairs begin.
Different insulation types react differently: fiberglass may dry unevenly, while cellulose often clumps and loses loft.
If the drywall has swollen, softened, or delaminated, replacement usually goes hand in hand with new insulation.
You’ll protect your home’s comfort, help prevent recurring damage, and restore a clean, dependable envelope your household can trust.
Repainting After Repairs
After drywall and insulation repairs are complete, repainting should wait until every affected surface has fully dried, been cleaned, and been primed with the correct sealer for any remaining water stains or odor.
You’ll protect the repair by following a controlled process:
- Match sheen and texture before color selection.
- Verify moisture readings in the ceiling cavity.
- Spot-prime patched seams and stain areas.
- Use compatible paint application tools and methods.
- Apply two thin coats for uniform coverage.
If the original finish was damaged, replace it rather than blending over weak film.
You’ll get better adhesion, fewer lap marks, and a cleaner result that belongs with the rest of your room.
Careful repainting restores the ceiling’s appearance and helps your space feel whole again.
How Mitigation Prevents Mold and Structural Damage
Mitigation limits the time moisture has to penetrate drywall, insulation, framing, and subflooring, which is critical because lingering water quickly creates conditions for mold growth and material decay.
You get faster mold prevention when technicians extract standing water, remove saturated materials, and deploy air movers and dehumidifiers to lower indoor humidity.
That response helps protect structural integrity by stopping wood swelling, fastener corrosion, and fiber breakdown before they spread.
You also reduce hidden damage when thermal imaging and moisture meters verify that cavities are drying completely.
When your ceiling dries evenly, you’re less likely to face microbial contamination or weakening around joints, seams, and load-bearing members.
In a well-coordinated mitigation plan, you’re not just cleaning up water—you’re preserving the building envelope and safeguarding your space.
What Ceiling Water Damage Repair Costs Depend On
Ceiling water damage repair costs depend on how far the moisture spread, what materials got wet, and whether the ceiling needs simple drying, partial replacement, or full reconstruction.
Your cost factors usually include:
- leak source repair
- demolition scope
- drying equipment time
- repair materials quality
- labor rates
If you catch damage early, you’ll often pay less because technicians can dry framing, replace small drywall sections, and repaint instead of rebuilding.
You may also see higher charges when insulation, trim, or electrical components need attention. Choosing matching repair materials matters, since texture, paint, and finish must blend with your existing ceiling.
When you compare estimates, ask for line-item details so you can understand what’s covered and feel confident in the process.
Frequently Asked Questions
How Long Does Ceiling Water Damage Repair Usually Take?
Usually, you’ll need one to seven days for ceiling water damage repair, depending on the repair timeline and restoration factors. You’ll fit better planning around drying, debris removal, structural checks, and repainting.
Can Ceiling Water Damage Be Repaired Without Replacing the Whole Ceiling?
Yes, you can often repair ceiling water damage without replacing the whole ceiling. You’ll use ceiling restoration techniques like drying, patching, and repainting, while improving water damage prevention to protect your space and maintain cohesion.
Is Ceiling Water Damage Covered by Homeowners Insurance?
Usually, you’re covered if the leak’s a sudden little surprise, not a slow-long-standing issue; your policy coverage varies. File insurance claims quickly, document the damage, and check exclusions for maintenance, roof, or plumbing-related seepage.
What Signs Show the Ceiling Needs Emergency Repair?
You need emergency repair if you see sagging drywall, active dripping, peeling paint, water stains, mold growth, or a bulging ceiling. These signs mean structural failure may be developing, so act fast.
Can I Stay Home During Ceiling Water Damage Repairs?
You can stay home if the remediation process is contained and safety concerns are minimal, but you’ll need to avoid work zones, ventilate affected rooms, and follow your technician’s instructions closely throughout repairs.
Conclusion
So, when your ceiling starts “decorating” itself with stains and sagging, you don’t just patch the symptom and call it fixed. You need ceiling water damage repair services to trace the leak, dry the structure, replace ruined drywall or insulation, and prevent mold from quietly taking over. The irony is clear: the water that seems harmless at first can cause the most expensive damage later. Acting fast keeps your ceiling, and your budget, intact.