
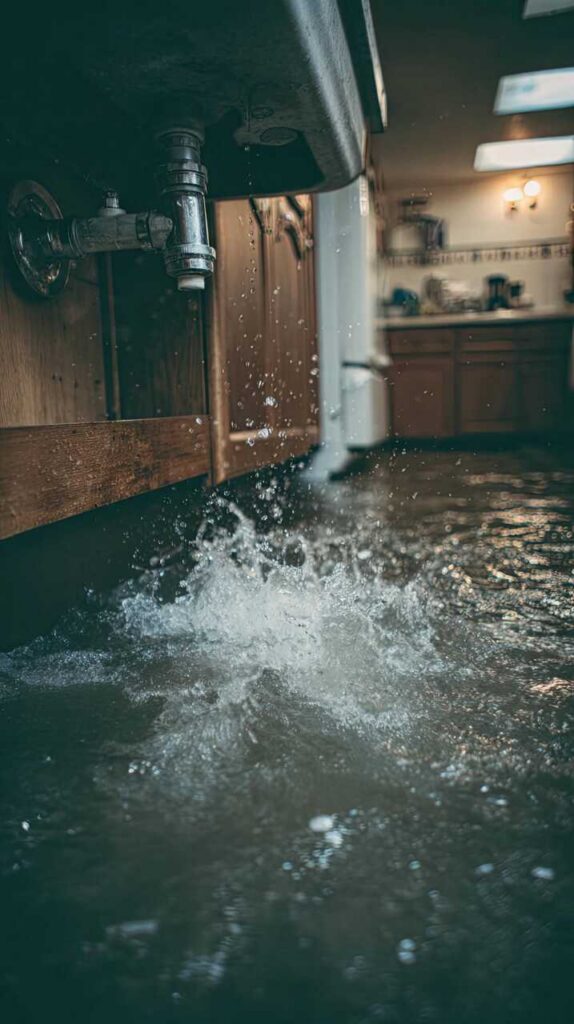
When a burst pipe floods your space, quick action is essential to minimize damage. You need to know the immediate steps to take, from shutting off the water supply to evaluating hidden damages. Gathering the right tools can make all the difference in your cleanup efforts. Understanding these processes not only helps you address current issues but also prepares you for future emergencies. Let’s explore the best solutions to tackle this situation efficiently.
Key Takeaways
- Shut off the main water supply immediately to prevent further flooding and damage from the burst pipe.
- Use a wet/dry vacuum to quickly remove standing water and minimize moisture exposure.
- Open windows and doors to enhance airflow and facilitate drying throughout the affected area.
- Inspect for hidden water damage, such as mold or stains, to address all issues effectively.
- Consider hiring professional restoration services if dampness or mold persists after initial cleanup efforts.
Understanding the Immediate Risks of Burst Pipes
When a pipe bursts, you face immediate risks that can escalate quickly if not addressed. High pipe pressure can lead to significant water damage, affecting walls, floors, and personal belongings.
Additionally, temperature fluctuations can create a hazardous environment, increasing the risk of mold growth and structural weakening. Water pooling can also electrify circuits, posing safety threats.
If not dealt with promptly, these issues can compound, leading to extensive repairs and higher costs. Understanding these risks is essential for effective response.
You’ll want to act fast and stay informed, ensuring you minimize damage and maintain a safe living space. Your proactive approach can make all the difference in managing the aftermath of a burst pipe.
Step-by-Step Guide: Shutting Off the Water Supply
If you’re faced with a burst pipe, knowing how to shut off the water supply quickly can greatly reduce damage.
First, locate your main water valve, usually found near where the water line enters your home. Turn it clockwise to close it fully. If you can’t find the main valve, check for individual water valves near the affected pipe.
Next, inspect your pipe insulation; if it’s damaged, you may need to repair or replace it after the emergency.
Once the water is off, make sure all faucets are open to relieve pressure. This quick action helps prevent further flooding, protecting your home and belongings.
Familiarizing yourself with these steps can make a significant difference in emergencies.
Gather These Tools for Quick Cleanup After a Burst Pipe
After shutting off the water supply, it’s time to focus on cleanup to mitigate damage from the burst pipe. Gather the right tools to ensure a quick response and effective damage assessment. Here’s a handy table to help you collect the necessary cleanup supplies and emergency equipment:
| Tool | Purpose | Importance |
|---|---|---|
| Wet/Dry Vacuum | Remove standing water | Quick extraction |
| Mop and Bucket | Clean up residual water | Surface drying |
| Towels | Absorb moisture | Prevent mold growth |
| Fans or Dehumidifier | Circulate air, reduce humidity | Speed up drying process |
| Safety Gear | Protect from contaminants | Ensure personal safety |
With these tools at hand, you’ll be well-prepared to tackle the aftermath of a burst pipe efficiently.
How to Safely Remove Standing Water
Before you start removing standing water, assess the water depth to determine the best approach.
Based on your assessment, choose appropriate tools like a wet/dry vacuum or sump pump to efficiently manage the situation.
Taking these steps ensures a safe and effective cleanup process.
Assessing Water Depth
When dealing with a burst pipe emergency, measuring water depth is essential for effective cleanup. Start by measuring the water level to determine the extent of flooding. Use a tape measure or a marked stick to gauge the depth accurately.
A flood evaluation helps you identify hazards, such as electrical risks or structural damage, that may arise from standing water. If the water depth exceeds a few inches, consider evacuating the area to ensure safety.
Knowing the water level also guides your removal strategy, allowing you to address deeper areas first. Always wear protective gear during this process, and remember that safety is your top priority while evaluating and managing the situation effectively.
Choosing Appropriate Tools
Once you’ve assessed the water depth, selecting the right tools for removing standing water becomes essential.
For shallow puddles, a wet/dry vacuum is your best bet, efficiently sucking up water and debris. If the water’s deeper, consider a submersible pump, which can quickly eliminate larger volumes.
Always have emergency supplies like buckets and mops on hand for quick clean-ups. Don’t forget about safety gear—wear gloves and boots to protect yourself while handling potential contaminants.
If the burst pipe requires immediate repair, keep pipe repair kits accessible for swift action.
Choosing the appropriate tools speeds up the cleanup process and helps you feel more in control during this stressful situation.
Effective Ways to Dry Out Affected Areas
To effectively dry out areas affected by a burst pipe, you must act quickly to minimize damage and prevent mold growth.
Here are some effective drying techniques:
Remove Standing Water: Use a wet/dry vacuum to eliminate any pooled water immediately.
Ventilation: Open windows and doors to enhance airflow, which aids in evaporation.
Dehumidifiers: Deploy commercial dehumidifiers to extract moisture from the air and surfaces.
Heat Sources: Utilize fans and heaters to increase air circulation and speed up drying.
How to Clean and Sanitize Surfaces After Water Damage
After a burst pipe, cleaning and sanitizing surfaces is essential to prevent health hazards and further damage. Start by removing any standing water using a wet/dry vacuum.
Once dry, inspect surfaces for mold growth. Use a mixture of water and mild detergent for initial cleaning. For effective mold prevention, follow up with a solution of one cup of bleach per gallon of water; this will help sanitize affected areas.
Apply this solution using a spray bottle or sponge, ensuring the surface remains wet for at least 10 minutes. Rinse thoroughly with clean water and dry the area completely.
Regularly check for dampness and respond immediately to any signs of water intrusion to maintain a safe, healthy environment.
Signs You Need Professional Water Damage Restoration Services?
How can you tell if your home needs professional water damage restoration services? Recognizing the signs early can save you from costly repairs. Here are some key indicators:
Persistent Dampness: If you notice lingering moisture or musty odors, it’s a sign of hidden water damage.
Stained Walls or Ceilings: Water stains can indicate leaks that require immediate attention.
Mold Growth: If you see mold, even in small patches, it’s often a sign that water damage is present.
Warped Flooring or Walls: Buckling or warping suggests structural issues caused by prolonged moisture exposure.
Don’t fall for restoration myths; addressing water damage promptly can prevent further complications.
Your home deserves the best care!
Tips for Preventing Future Burst Pipe Emergencies
To prevent future burst pipe emergencies, you should conduct regular inspections of your plumbing system.
Insulating vulnerable areas and monitoring temperature changes can greatly reduce the risk of pipe failure.
Regular Pipe Inspections
Set a Schedule: Aim for inspections at least twice a year to catch early signs of wear.
Check for Leaks: Look for water stains or damp spots, which can indicate hidden issues.
Assess Pipe Material: Different materials have varying lifespans; know yours and its vulnerabilities.
Hire Professionals: Consider expert assessments for thorough evaluations, especially in older homes.
Stay proactive with your inspection frequency to prevent burst pipe emergencies and ensure your home remains safe and sound.
Insulate Vulnerable Areas
While you may not think about pipe insulation often, properly insulating vulnerable areas in your home can greatly reduce the risk of burst pipes during cold weather.
Focus on spots like unheated basements, crawl spaces, and exterior walls where pipes are exposed to frigid temperatures. Use foam sleeves or fiberglass insulation to wrap these pipes securely.
Don’t overlook areas around windows or doors that may allow cold drafts, as they can contribute to freezing conditions.
By addressing these vulnerable areas, you create a protective barrier that maintains the temperature of your pipes.
Investing time in pipe insulation prevents costly repairs and fosters a safer, more comfortable living environment for you and your loved ones.
Monitor Temperature Changes
Monitoring temperature changes is essential for preventing future burst pipe emergencies. By keeping an eye on temperature fluctuations, you can take proactive measures to protect your plumbing.
Here are four key steps you can take:
Install Temperature Sensors: Use smart sensors that alert you to extreme temperature changes.
Regularly Check Thermostats: Make sure your home’s heating system is functioning properly, especially during cold months.
Isolate Problem Areas: Identify and monitor spots in your home that are prone to freezing temperatures.
Insulate Pipes: Apply insulation to pipes in unheated areas to maintain a stable temperature.
Identifying Signs of Hidden Water Damage
Identifying hidden water damage can be essential, especially since it often lurks behind walls and beneath floors, making it easy to overlook. Watch for water stains, as they can indicate hidden leaks. Mold growth is another red flag; if you notice musty odors, check your insulation and drywall for deterioration. Elevated moisture levels can lead to structural damage, so keep an eye on your flooring concerns too.
Here’s a quick reference table to help you recognize signs of hidden water damage:
| Signs of Damage | Possible Consequences |
|---|---|
| Water stains | Structural damage |
| Mold growth | Health issues |
| Drywall deterioration | Increased repair costs |
| Insulation issues | Energy inefficiency |
| Flooring concerns | Safety hazards |
Insurance and Repair Costs for Burst Pipe Damage
Understanding the financial implications of burst pipe damage is essential for homeowners. Steering through insurance coverage and repair costs can be complex, but knowing what to expect helps. Here are key points to reflect on:
Review Policy Limitations: Check your insurance for exclusions related to burst pipes.
Obtain Repair Estimates: Get multiple estimates to understand potential restoration costs.
Understand Deductible Amounts: Know how much you’ll pay out-of-pocket before insurance kicks in.
Explore the Claim Process: Familiarize yourself with the steps to file a claim effectively.
Having emergency funds can ease financial stress during this time.
Employing mitigation strategies can also minimize damage, potentially lowering restoration costs and ensuring smoother claims management.
Frequently Asked Questions
What Are the Common Causes of Burst Pipes?
Common causes of burst pipes include frozen pipes during cold weather, pressure buildup from blockages, deterioration in old plumbing systems, and tree roots invading underground pipes, compromising their integrity and leading to potential leaks or bursts.
How Can I Identify a Burst Pipe Early?
You can identify a burst pipe early by noticing pipe symptoms like unusual sounds or damp spots. Use detection methods such as infrared cameras or moisture meters to prevent extensive damage and maintain your home’s safety.
Is My Homeowner’s Insurance Likely to Cover This Damage?
Your homeowner’s insurance might cover burst pipe damage, but it depends on your policy details. Review your coverage to understand limitations and exclusions, ensuring you know what’s included before filing a claim.
How Long Does It Take to Dry Out a Home Completely?
Drying out a home can feel like waiting for a glacier to melt. Depending on drying techniques and moisture assessment, it typically takes three to seven days for complete dryness, ensuring your space is safe and comfortable again.
Can I Use a Shop Vac for Water Removal?
Yes, you can use shop vacs for water extraction. They effectively remove standing water, but make sure you’ve cleared larger debris first. Always follow the manufacturer’s guidelines for best performance and safety during the process.
Recap
In burst pipe emergencies, time is of the essence. Remember, “an ounce of prevention is worth a pound of cure.” By acting quickly to shut off the water, using the right tools for cleanup, and addressing hidden damage, you can minimize the impact. Don’t hesitate to call in professionals if needed, and always review your insurance policy. With proper precautions, you can protect your home and avoid future incidents. Stay proactive to keep your space safe and dry.