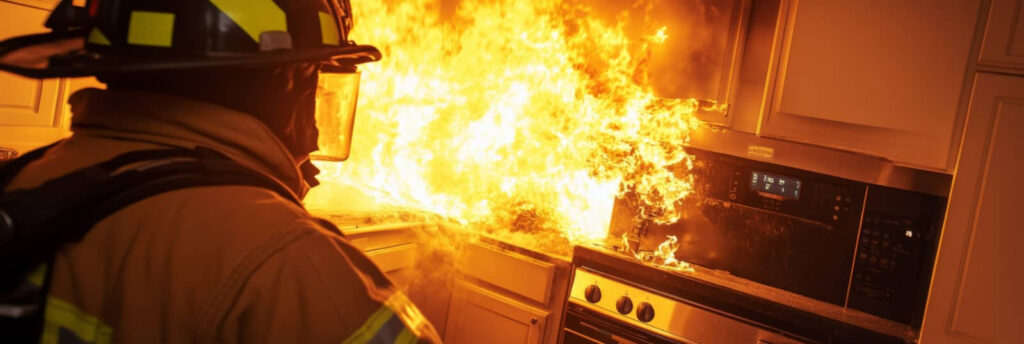
Some fire-damaged buildings can develop hidden moisture problems if they aren’t dried quickly. Structural Drying After Fire Damage requires a structured approach because water used to extinguish the fire can saturate framing, insulation, and subfloors. The right drying sequence, equipment, and moisture checks can help limit secondary damage, but the critical step most owners miss is identifying moisture trapped where you can’t see it.
Key Takeaways
- Assess fire-damaged structures with moisture meters and thermal imaging to map hidden water in framing, subfloors, and sheathing.
- Use air movers, dehumidifiers, and controlled ventilation to dry cavities quickly and prevent mold growth within 24 to 48 hours.
- Open access points and adjust equipment placement to maintain balanced airflow and remove moisture from hidden spaces effectively.
- Check for softening, warping, delamination, and lingering damp zones to protect structural integrity and avoid concealed failures.
- Engage certified fire damage professionals early for comprehensive assessment, safe drying plans, and accurate evaluation of hidden hazards.
What Fire Damage Structural Drying Involves
Fire damage structural drying involves removing excess moisture from walls, floors, framing, and other structural materials after fire suppression efforts, so you can stop secondary damage before it spreads.
You’ll begin with a fire damage assessment that identifies affected assemblies, moisture levels, and the extent of saturation. Then you’ll apply targeted drying techniques, such as air movement, dehumidification, and controlled ventilation, to bring structural materials back to safe moisture ranges.
You’ll also monitor readings at set intervals, adjust equipment placement, and verify that hidden cavities are drying evenly. This process helps you protect your property, stay informed, and work with a team that understands the technical demands of recovery.
When you follow a disciplined drying plan, you reduce instability in the structure and support a cleaner restoration outcome.
Why Fast Drying Prevents Hidden Damage
Fast drying limits hidden moisture spread into wall cavities, subfloors, and insulation after fire suppression.
By reducing moisture exposure quickly, you lower the risk of mold growth and secondary contamination.
You also help preserve structural integrity, since prolonged saturation can weaken framing, sheathing, and load-bearing materials.
Hidden Moisture Spread
Even after the visible flames are out, heat, steam, and firefighting runoff can drive moisture deep into wall cavities, subfloors, insulation, and framing.
You need to treat that water as hidden spread, not surface dampness. It can travel along fasteners, seams, and voids, creating hidden leaks that don’t show up during a quick inspection.
Use moisture detectors to map elevated readings, compare affected zones, and verify drying progress at multiple depths.
Your team should open targeted access points, remove saturated materials, and position air movers and dehumidifiers to pull moisture from trapped assemblies.
When you dry the structure fast, you reduce the chance that residual water keeps migrating and damaging adjacent components.
That’s how you protect the building’s integrity and keep your restoration plan on track.
Mold Growth Prevention
When moisture stays trapped after fire damage, mold can begin colonizing porous materials in as little as 24 to 48 hours, especially in warm, poorly ventilated assemblies.
You protect your space by drying quickly, because lower moisture levels limit the conditions mold spores need to activate and spread. Use targeted air movement, dehumidification, and continuous monitoring to pull water from framing, drywall, and insulation before colonies establish.
You’ll also reduce the chance of hidden contamination behind finishes, where symptoms often stay out of sight. By keeping your drying plan tight and your readings verifiable, you help your home or facility return to a safer, healthier condition.
Fast action matters, and it helps your team stay ahead of avoidable damage together.
Structural Integrity Loss
Moisture left behind after fire damage doesn’t just create mold risk; it can also weaken structural materials from the inside out. You need fast drying to protect framing, subfloors, and sheathing before swelling, delamination, or corrosion takes hold.
During a structural assessment, technicians check load-bearing members for softening, warping, and hidden decay that you can’t see at first glance. Moisture mapping pinpoints saturation zones, so you can target drying equipment where damage is active, not where surfaces only look dry.
When you act quickly, you reduce the chance of concealed failures that compromise safety and increase repair scope. You’re not just drying a building—you’re preserving the structure your home community depends on.
Drying the Roof, Walls, and Floors
You need to remove residual moisture from the roof assembly first, since trapped water can weaken sheathing, insulation, and framing.
Then you should dry wall cavities and exposed wall surfaces with controlled airflow and dehumidification to stop swelling, corrosion, and microbial growth.
Finally, you must verify floor moisture levels and dry subfloors and finishes until readings return to safe structural limits.
Roof Moisture Removal
After fire damage, roof moisture removal should begin as soon as the structure is deemed safe, since trapped water can soak decking, framing, insulation, and wall cavities.
You’ll inspect for active roof leaks, remove saturated materials, and expose hidden wet zones so drying can start fast.
Use controlled heat, air movement, and dehumidification to lower moisture without overdriving fragile assemblies.
You should verify that moisture barriers are intact or repaired, because they help prevent rewetting during restoration.
Measure moisture content at multiple roof points, then track readings until they match baseline conditions.
When you work methodically, you protect structural capacity, reduce microbial risk, and keep your team aligned on a clear recovery plan.
Wall And Floor Drying
Once the roof is stabilized, you can shift to wall and floor drying by opening affected cavities, removing trapped water, and establishing balanced airflow through each wet zone.
You’ll meter moisture in framing, sheathing, subflooring, and finishes, then place dehumidifiers and air movers to drive evaporation without over-drying surfaces.
Pull baseboards, expose insulation, and isolate saturated materials so you can verify what still supports wall restoration.
In floors, inspect for delamination, cupping, or microbial risk, and dry from both sides when possible.
If materials stay swollen or structurally compromised, schedule flooring replacement instead of delaying repairs.
You and your crew can document readings, track progress, and restore the space efficiently, helping everyone get back into a safe, dry home.
Equipment Used to Dry Fire-Damaged Structures
Structural drying after fire damage relies on specialized equipment that removes moisture quickly while controlling heat, airflow, and humidity. You’ll choose tools that match the structure’s condition and your team’s drying goals, so you can work efficiently and confidently.
- Refrigerant units for warm, enclosed spaces
- Desiccant units for low-temperature control
- Air movers for targeted surface evaporation
- Moisture meters for verification
- Hygrometers for humidity tracking
Different dehumidifier types help you manage vapor loads, while air mover techniques direct airflow across affected surfaces without creating dead zones.
You should place equipment to support consistent circulation, then adjust settings as readings change. That approach keeps you aligned with a professional drying plan and helps your space recover faster.
Drying Insulation and Framing
With the right drying equipment in place, you can turn your focus to insulation and framing, where hidden moisture often lingers after fire suppression.
You’ll need to identify which insulation types can recover and which must be removed, because dense batts, loose-fill, and foam respond differently to airflow and heat.
Direct focused drying at exposed cavities so vapor escapes without overheating adjacent surfaces.
For framing materials, inspect dimensional lumber, engineered wood, and metal members for trapped dampness, then keep air moving across joints and penetrations.
You can support the process by opening wall sections where needed and maintaining steady dehumidification.
When you dry these assemblies correctly, you help restore a safer, cleaner structure and stay on track with your team.
Moisture Checks Before Fire Damage Repairs
Before you start any repairs, you need to verify that moisture levels are actually within acceptable limits across the affected structure. Use calibrated moisture detection tools to compare wet and dry areas, then document every reading for a clear repair assessment.
You’re not guessing here; you’re confirming that hidden water won’t compromise new materials or fasteners.
- Check framing, subflooring, and sheathing
- Compare readings at multiple depths
- Record ambient humidity and temperature
- Mark any lingering damp zones
- Recheck after brief ventilation
When you follow the same method your team trusts, you build confidence and keep the project moving.
Accurate checks help you join the drying process with a shared standard, so repairs start on a stable, measurable foundation.
When to Call Fire Damage Pros
You should call fire damage professionals as soon as the damage goes beyond surface cleanup, affects structural materials, or leaves you unsure about hidden hazards.
They’ll perform a fire damage assessment to identify charring, smoke migration, soot corrosion, and moisture intrusion from firefighting. You’ll get an emergency response that stabilizes the site, limits secondary damage, and helps protect your team’s health.
If walls, framing, insulation, wiring, or HVAC components were exposed, don’t delay; hidden thermal stress can weaken assemblies and trap contaminants.
Pros use meters, thermal imaging, and controlled drying plans to verify safe recovery. When you bring in certified specialists early, you join a process built for accuracy, compliance, and faster restoration, so your property can move from uncertain to structurally sound with confidence and less disruption.
Frequently Asked Questions
Can Structural Drying Reduce Smoke Odor After Fire Damage?
Yes, you can reduce smoke odor with structural drying, but it won’t eliminate it alone. You’ll need odor removal techniques and smoke damage solutions, like cleaning, sealing, and filtration, to fully restore indoor air quality.
How Long Does Fire Damage Drying Usually Take?
Usually, you’ll see fire damage drying take 3–7 days, though heavier saturation can stretch longer. Your fire damage timeline depends on materials, humidity, and drying equipment, which works like a steady metronome restoring balance.
Is It Safe to Stay Inside During Structural Drying?
Usually, you shouldn’t stay inside unless professionals confirm conditions are safe. You need safety precautions, continuous air quality monitoring, and proper ventilation during structural drying. If you smell smoke or chemicals, leave immediately.
Can Drying Prevent Mold Growth After Firefighting Efforts?
Yes, you can prevent mold by using drying techniques right after firefighting, even if you think visible damage is minor. You’ll lower moisture fast, improve mold prevention, and protect materials before spores take hold.
Does Insurance Cover Fire Damage Structural Drying Costs?
Usually, you can recover fire damage structural drying costs through insurance claims if your policy covers sudden loss. You should document moisture, mitigate further damage, and coordinate with adjusters to verify covered drying expenses.
Final Thoughts
You’ve seen how fire damage hides moisture in walls, roofs, and floors, and you know the clock starts immediately. If you dry fast, monitor constantly, and target every concealed cavity, you reduce mold, warping, and structural failure before they spread. But the final step can decide everything: verify dryness with precise moisture checks, then bring in fire damage pros when the readings stay uncertain. That’s how you protect the structure—and what comes next.