
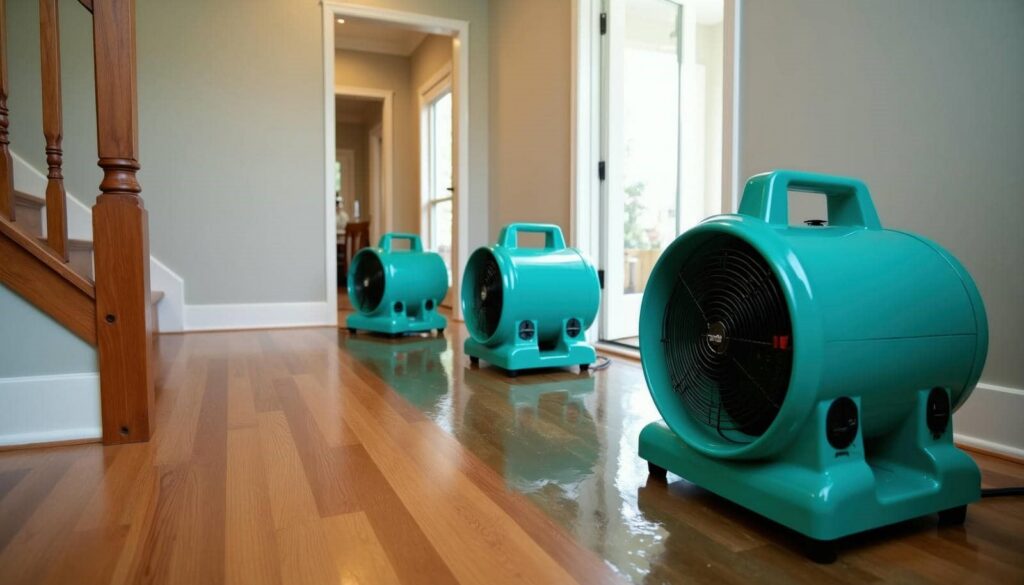
You may not realize that water-damaged materials can look dry while hidden moisture still drives decay. You need structural drying to remove that trapped water from walls, floors, and cavities with controlled airflow, dehumidification, and careful monitoring. If you skip the process or rush it, you can lock in damage and create mold risk. The real question is how pros know when the structure is actually dry, and that part matters most.
Key Takeaways
- Structural drying removes moisture from building materials and indoor air after water damage.
- Fast drying helps prevent mold growth, warping, and deeper structural deterioration.
- Professionals use moisture meters, thermal imaging, air movers, and dehumidifiers to track and speed drying.
- The process includes assessing damage, isolating wet areas, removing standing water, and monitoring moisture until safe levels are reached.
- Seek professional help if moisture stays high, materials warp, odors persist, or contamination or structural sagging appears.
What Is Structural Drying After Water Damage?
Structural drying after water damage is the controlled process of removing moisture from building materials and indoor air to return a structure to safe, usable conditions.
You use it after water damage to stabilize surfaces, limit hidden moisture, and prepare the space for repair. The work starts with inspection, moisture mapping, and material identification, so you can choose the right drying techniques for drywall, flooring, framing, and insulation.
You then apply air movement, dehumidification, and temperature control in a coordinated way. This method helps you track progress with meters and adjust equipment as conditions change.
When you follow a structured plan, you protect the building and stay connected to a team approach that supports recovery.
Why Fast Structural Drying Matters
Fast structural drying matters because you need to stop moisture from weakening framing, drywall, and subfloor materials before deterioration spreads.
You also need to dry the structure quickly to limit conditions that support mold growth.
When you act fast, you can shorten the overall restoration timeline and reduce repair complexity.
Prevent Structural Deterioration
When water lingers in framing, subfloors, and wall cavities, it begins breaking down materials quickly by swelling wood, weakening fasteners, and compromising adhesives.
You need to remove that moisture fast so the structure keeps its shape and load path. Use targeted airflow, dehumidification, and temperature control to lower material content before distortion sets in.
Check sheathing, joists, and plate connections methodically, because small changes can turn into costly repairs.
In your restoration plan, add preventive measures like sealing penetrations and restoring moisture barriers where water entered. That helps you protect assemblies your crew depends on and keeps everyone working toward the same standard.
Fast drying isn’t just cleanup; it’s how you preserve structural integrity and avoid deterioration that spreads through the whole system.
Reduce Mold Growth
Once moisture stays trapped in framing, subfloors, or wall cavities, mold can start colonizing porous materials in as little as 24 to 48 hours.
You need fast structural drying to interrupt that timeline and protect your home’s indoor environment. By pulling moisture from hidden assemblies, you lower the chance that spores will find the damp conditions they need to spread.
Monitor humidity control with meters, dehumidifiers, and airflow adjustments so you keep relative humidity in the safe range. This approach supports mold prevention and reduces the need for invasive cleanup later.
When you act quickly and methodically, you’re taking the same disciplined steps your neighbors use to keep structures healthier, drier, and easier to occupy.
Speed Restoration Process
A prompt restoration timeline limits how far water can move into finishes, framing, and insulation, which means you can dry more of the structure before hidden damage spreads.
You protect your home by starting assessment, extraction, and dehumidification right away. Fast action helps you preserve materials, cut demolition, and keep your team aligned on one goal: stable drying.
With proper airflow management, you move moisture off wet surfaces and support even evaporation. Skilled technicians then adjust drying techniques to match the material, room size, and damage level.
When you respond quickly, you reduce odor, swelling, and structural weakening, and you improve the chance that your space returns to normal with less disruption and greater confidence for everyone involved.
How Pros Check Moisture in Walls and Floors
You’ll check walls and floors with a moisture meter to get exact readings and compare wet areas against dry reference points.
You’ll also use thermal imaging to spot cooler zones that can signal hidden moisture behind surfaces. Together, these tools help you map the extent of damage and verify when drying is progressing.
Moisture Meter Readings
Moisture meter readings show whether water has penetrated drywall, framing, subfloors, or finishes, and they help pros map the full extent of the damage.
You’ll use moisture measurement to compare affected areas against dry reference points, so you can tell what still needs attention. Pros often take pin and pinless readings at consistent intervals, then record values in a grid to track progress.
That method keeps your team aligned and helps you choose the right drying techniques for each material. As readings drop toward normal levels, you know the structure is responding.
If numbers stay elevated, you keep monitoring and adjust airflow, dehumidification, or exposure time. With disciplined checks, you stay in control and move the job toward a safe, dry finish.
Thermal Imaging Checks
Thermal imaging lets you spot temperature patterns that often reveal hidden moisture behind walls, under floors, and around trim. You use thermal imaging technology to scan surfaces after a loss, looking for cool anomalies that can signal evaporation, wet insulation, or trapped water.
You’ll compare readings with dry areas, then verify findings with moisture detection methods, such as pin or pinless meters, to confirm what you’re seeing. This step helps you and your crew map affected zones faster, reduce guesswork, and focus drying equipment where it matters.
When you document each scan, you build a clear drying plan and stay aligned with the team. That shared process helps you move confidently from suspicion to proof, and from damage to recovery.
How the Structural Drying Process Works
Once the source of water damage is contained, the structural drying process begins with a full moisture assessment to identify affected materials, hidden saturation, and the extent of water migration.
You then isolate wet zones, verify readings, and track progress so you’re not guessing. Your goal is controlled moisture evaporation, supported by steady air circulation and documented checks.
- Map every damp surface and cavity.
- Remove standing water and exposed wet contents.
- Monitor conditions until materials return to safe levels.
You stay methodical because each step reduces risk of secondary damage and helps your space recover with confidence.
What Equipment Pros Use for Structural Drying
Professionals use specialized equipment to control airflow, heat, and humidity so wet materials dry as quickly and safely as possible. You’ll usually see air movers, low-grain refrigerant dehumidifiers, and sometimes desiccant units, each chosen for specific dehumidifier types and moisture loads.
Air movers push high-velocity air across surfaces, and air mover efficiency matters because better placement reduces stagnant zones and helps you dry within the same restoration team’s plan.
Technicians also use hygrometers, moisture meters, and thermal imaging to verify progress and spot trapped moisture in walls, floors, and cavities.
If you’re working with a qualified crew, you’ll notice they adjust equipment as conditions change, keeping the drying environment controlled, consistent, and efficient for your property and your peace of mind.
How Long Structural Drying Takes
Drying equipment can move a lot of moisture out of a structure, but the total drying time still depends on how much water entered the building, which materials got wet, and how quickly the crew starts mitigation.
You’ll usually see a drying duration of several days to two weeks, though environmental factors can shorten or extend that window.
- Light intrusion: a few days
- Moderate saturation: about one week
- Heavy loss: two weeks or more
You should expect faster progress when temperatures, airflow, and humidity stay controlled.
Porous materials, hidden cavities, and cooler spaces slow the job.
When you work with a trained team, you get a methodical plan that matches the loss and keeps your space on track.
How to Tell Your Home Is Drying Properly
How do you know structural drying is working? You should see steady drying signs: surfaces feel less cool, paint and trim stop darkening, and odors fade.
Check moisture indicators with a meter on drywall, baseboards, subfloor, and framing, then compare readings daily. You’re looking for numbers that move toward the normal range for the material and room conditions.
Watch for even progress across affected areas, not just one spot. Air movers and dehumidifiers should create a consistent, controlled environment, and you may notice condensation disappearing from windows and metal.
Keep a simple log so you can track trends and stay connected to the process. If readings keep dropping, your home’s structure is drying properly and recovery is on track.
What Slows Structural Drying Down?
Several factors can slow structural drying, and most of them reduce airflow, limit dehumidification, or hide moisture in materials. You can keep pace by checking the usual bottlenecks:
Airflow restrictions: closed doors, packed rooms, and furniture against walls trap damp air.
High humidity levels: if your dehumidifier can’t lower indoor moisture, drying stalls fast.
Hidden moisture: insulation, subfloors, and wall cavities keep water from escaping.
You’ll dry faster when you open pathways, lift items off wet surfaces, and run equipment in balanced zones.
Watch for cool, stagnant pockets, because they signal trapped moisture. When you understand these limits, you can work with the drying process instead of fighting it, and your home’s materials can return to a safer moisture range.
When to Call a Water Damage Restoration Pro
Even with good airflow and dehumidification, some water damage needs professional help because the drying problem is bigger than what basic equipment can control.
You should call a restoration pro when moisture readings stay high after 24 to 48 hours, materials feel warped, or odors suggest hidden dampness.
Watch for water damage indicators like bubbling paint, swollen trim, staining, and soft drywall. Those restoration signs often mean water has reached cavities, insulation, or subfloors.
A pro can map moisture, remove unsalvageable materials, and set targeted drying goals.
If you’re dealing with contaminated water, repeated leaks, or structural sagging, don’t wait. Getting expert help early protects your home, supports your recovery, and helps you move forward with confidence.
Frequently Asked Questions
Can Structural Drying Help Prevent Mold Growth After a Leak?
Yes, you can reduce mold risk with structural drying after a leak. You’ll use drying techniques quickly to remove hidden moisture, then support mold remediation if growth starts, helping your property stay safe and your team informed.
Is Structural Drying Safe for Hardwood Floors?
Yes, if you use controlled drying techniques, it’s safe for your hardwood floors—sometimes. You’ll protect hardwood preservation by monitoring moisture, airflow, and temperature carefully, and you’ll avoid warping, cupping, or cracking.
Will I Need to Leave My Home During Drying?
You may need temporary relocation if drying equipment, contamination, or repairs make your space unsafe or unlivable. Your drying timeline determines this; professionals’ll assess conditions, then tell you when you can stay comfortably.
Can Structural Drying Reduce Lingering Water Damage Odors?
Yes—structural drying can cut lingering odors when you remove moisture fast; what else keeps smells trapped? You’ll improve odor removal techniques and drying equipment effectiveness, and you’ll help your space feel clean, safe, and yours.
Does Insurance Usually Cover Structural Drying Services?
Usually, you’ll get insurance coverage for structural drying after water damage if the loss is sudden and covered. You should document everything, verify policy limits, and ask your adjuster about exclusions, deductibles, and approved vendors.
Recap
In the end, structural drying works best when you act fast, monitor moisture carefully, and use the right equipment. You should remember that mold can begin growing in as little as 24 to 48 hours after water damage, so every hour matters. If your walls, floors, or subfloor stay damp, you’ll keep risking hidden decay and costly repairs. When readings don’t drop as expected, you should call a water damage restoration pro right away.