Water damage can spread like a quiet stain on a ledger, and you need to catch it fast. If you ignore a wet ceiling or wall, you invite mold, rot, and hidden structural loss that only gets more expensive. You can stop the leak, dry the area, and inspect for deeper damage, but the real question is how much may already be out of sight.
Key Takeaways
- Quick water damage repairs prevent structural weakening of drywall, framing, and insulation.
- Fast action reduces mold growth risk, which can begin within 24 to 48 hours.
- Early repairs stop hidden moisture from spreading and causing costly future damage.
- Prompt leak detection and drying help protect electrical systems and household safety.
- Professional restoration restores property value and ensures damaged areas are repaired correctly.
What Ceiling Water Damage Looks Like
Ceiling water damage usually shows up as discolored patches, yellow or brown stains, bubbling or peeling paint, sagging drywall, or visible cracking around the affected area.
You may also notice ceiling discoloration that spreads beyond one spot, along with water stains that darken over time. In textured finishes, the ceiling texture can swell, soften, or flake.
If you smell a musty odor, treat it as a clue that hidden moisture is present. Check for sagging drywall, paint bubbling, and any areas that feel cool or damp.
These signs often point to insulation damage above the ceiling. A careful moisture assessment helps you confirm the source and gauge whether structural integrity is still intact.
When you know what to look for, you can act with your neighbors and keep the repair process clear.
Why Ceiling Water Damage Needs Fast Action
You need to act fast when ceiling water damage appears because moisture can weaken framing, drywall, and insulation before you notice visible failure.
If you wait, hidden structural damage can spread through the assembly and make repairs more complex and costly.
You also risk mold growth, which can start quickly and spread beyond the original leak area.
Hidden Structural Risks
When water stains appear overhead, the visible spot often understates the damage spreading above it. You’re not just dealing with discoloration; saturated drywall, weakened joists, and corroded fasteners can quietly reduce structural integrity.
If you delay repairs, the load path above you can shift, causing sagging, cracking, or partial collapse. Inspect insulation, framing, and any electrical runs near the leak, because moisture can hide in cavities and keep degrading materials.
Quick action limits long term consequences and helps your home stay safe and solid. You deserve a ceiling that protects your space, not one that puts it at risk.
Bring in a qualified repair team early, document the damage, and dry the area completely before closing it up again.
Mold Growth Spreads
Because moisture lingers inside ceilings, mold can start colonizing damp drywall, insulation, and framing within 24 to 48 hours. You need fast drying and cleanup to stop spread and reduce health risks for your household.
If you delay, spores can move through vents, stain surfaces, and weaken materials you trust.
- Remove wet insulation and saturated drywall quickly.
- Run dehumidifiers and airflow to lower hidden moisture.
- Inspect adjoining rooms for early mold prevention signs.
You’re not handling this alone; a quick response protects your space and keeps your home safer for everyone inside.
When you act early, you limit odor, contamination, and repair costs. Focus on drying, containment, and professional inspection so mold doesn’t get a foothold.
Stop the Leak and Protect the Room
First, you need to find the leak source and shut off water if you can do so safely.
Then dry the affected area with fans, towels, or a wet vac to reduce moisture in the structure.
Protect the room by moving items away, catching drips, and blocking further damage until repairs begin.
Find Leak Source
Pinpoint the leak source as soon as possible so you can stop further damage and protect the room. Use targeted leak detection to trace moisture back to the entry point, then perform a careful plumbing inspection at fixtures, supply lines, joints, and shutoff valves.
You’ll work faster when you narrow the path.
Check under sinks for drips, loose fittings, and wet seals.
Inspect walls near pipes for staining, bubbling, or soft spots.
Test appliances and nearby connections for active seepage.
If you spot the source, shut off the supply and mark the area for repair. This keeps your team aligned and helps you protect the space with confidence.
Dry Affected Area
Once you’ve stopped the leak, dry the affected area right away to limit structural damage and mold growth.
Open windows and doors when weather allows, and use fans to move moist air out of the room.
Prioritize ventilation importance because trapped humidity keeps materials wet longer.
Set up dehumidifier usage in the center of the space, close to damp walls or flooring, so it can pull moisture from the air efficiently.
Remove soaked rugs, cushions, and other porous items if you can do so safely.
Wipe hard surfaces with clean towels to speed evaporation.
Check hidden spots such as baseboards, corners, and under furniture.
Act quickly and methodically, and you’ll protect your space, reduce repair costs, and keep your home comfortable for everyone.
Prevent Further Damage
Shut off the water source right away to stop additional flooding, then isolate the room by moving furniture, electronics, and valuables out of the wet area. You’ll reduce losses fast and give your team room to work.
Next, identify the leak point and patch it temporarily if you can do so safely. Start water extraction as soon as standing water appears, because delay spreads damage into subflooring and walls. Support moisture control by opening doors, using fans, and keeping HVAC running if it’s safe.
- Remove soaked rugs and cushions
- Lift curtains and drape them away from damp floors
- Keep children and pets out of the area
When you act quickly, you protect your space, cut repair costs, and stay part of a prepared, resilient home.
Dry Ceiling Water Damage Quickly
Start drying ceiling water damage immediately to limit stain spread, sagging, and mold growth. You should shut off affected fixtures, then use emergency measures like fans, dehumidifiers, and open vents to move moist air out fast.
Aim airflow across the ceiling surface, not directly at loose material, so you don’t worsen the damage. If water is pooling above, relieve pressure carefully and contain drips with buckets or plastic sheeting.
Use proven drying techniques: keep indoor humidity low, run the HVAC if it’s safe, and replace wet insulation only after the area dries.
Check moisture levels with a meter, and repeat drying until readings stabilize. Quick action helps you protect your space, reduce repair costs, and stay part of a home that feels safe and sound.
Check for Mold, Rot, and Hidden Damage
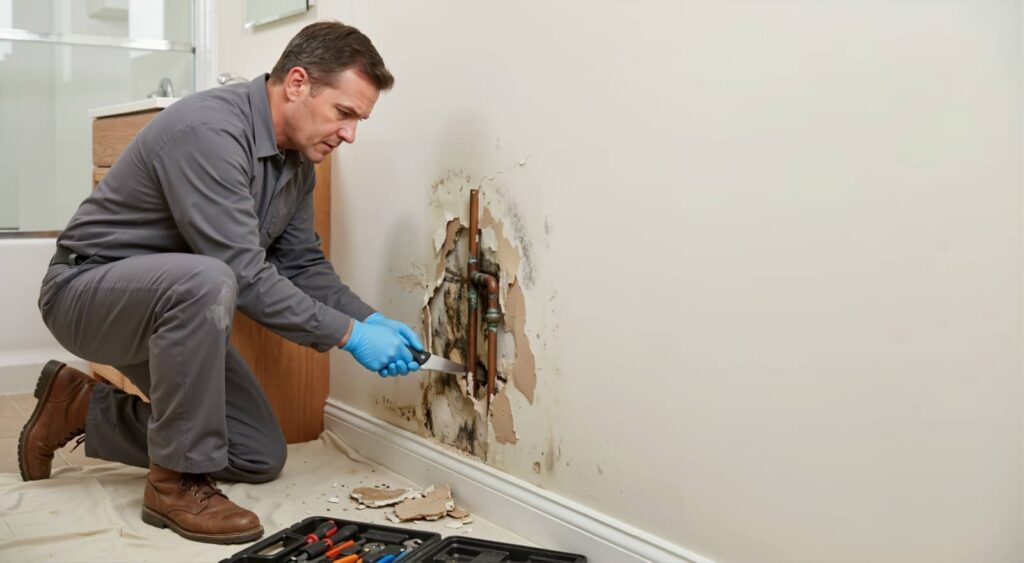
After the ceiling is dry, inspect it for mold, rot, and hidden water damage. You can spot trouble early by checking stains, soft drywall, and musty odors. A careful mold inspection helps you protect your home and your crew of helpers who care about safe spaces.
- Look for dark spots around seams and vents.
- Press lightly for spongy areas that signal rot.
- Use a flashlight to find damp insulation or warped framing.
Act fast if you see growth or feel moisture; hidden damage spreads behind paint and trim.
Good rot prevention starts with close checks, steady airflow, and prompt cleanup. When you stay alert, you keep repairs small, your ceiling sound, and your household confident.
Repair Ceiling Water Damage the Right Way
Once you’ve confirmed the ceiling is dry and sound, cut out any damaged drywall, replace wet insulation, and patch the opening with matching material.
You’ll keep the ceiling repair tight by fastening new drywall to solid framing, taping seams, and applying joint compound in thin coats. Sand between coats so the surface stays level and blends cleanly with the surrounding ceiling.
Prime the patch before painting to block stains and match sheen. During water restoration, check nearby joints, vents, and light fixtures for soft spots or discoloration, and seal any gaps that let moisture travel.
Work methodically, measure twice, and keep your tools clean. That way, your repair looks consistent, performs well, and helps your space feel whole again.
When to Call Water Damage Pros
Call water damage pros when the damage is spreading, the source isn’t obvious, or moisture has reached structural materials, insulation, or electrical systems.
You need fast emergency response before hidden dampness worsens and makes repairs more complex. A professional assessment helps you separate surface staining from active intrusion, so you can act with confidence and protect your space.
Call immediately if ceilings sag, floors soften, or walls feel cool and damp.
Bring in pros when you smell musty odors after visible water is gone.
Get help if breakers trip or outlets are wet.
You’re not overreacting; you’re joining others who handle damage early and restore the property safely.
Prevent Future Ceiling Water Damage
To prevent future ceiling water damage, you need to stop leaks at the source and keep moisture from reaching framing, insulation, and drywall.
Inspect roof flashing, pipe joints, HVAC condensate lines, and bathroom fixtures after storms or repairs. Seal gaps with quality caulk, replace damaged shingles, and use waterproofing techniques around penetrations, vents, and skylights.
In attics, check ceiling insulation for wet spots, compression, or mold, then replace it fast so it doesn’t hold moisture against the ceiling plane. Improve ventilation to lower humidity and dry hidden spaces.
Install leak sensors near vulnerable areas, and schedule seasonal inspections so you stay ahead of problems with your team, your home, and your neighbors. Document maintenance dates, because consistent follow-through protects everyone’s space.
Frequently Asked Questions
How Much Does Water Damage Repair Usually Cost?
You’ll usually pay $1,200–$5,000 for water damage repair, though cost factors like extent, mold, and materials shift repair estimates. You’re not alone—get an inspection quickly so you can plan confidently.
Does Homeowners Insurance Cover Water Damage Repairs?
Yes, homeowners insurance often covers sudden water damage, but not gradual leaks or poor maintenance. You’ll need to check your policy’s insurance coverage details, document the damage fast, and file your claim promptly.
How Long Do Water Damage Repairs Take?
Like a clock, your water damage timeline usually runs 3-14 days for minor repairs, while major drying and reconstruction can take weeks. You’ll move through the repair process faster if you act quickly.
Can Water-Damaged Drywall Be Safely Reused?
Usually, you can’t safely reuse water-damaged drywall if it’s swollen, soft, or moldy. You’ll need drywall safety checks and restoration techniques. If you dry it fast and damage is minor, you might salvage it.
What Tools Help Detect Hidden Water Damage?
You can use moisture meters and thermal cameras to spot hidden water damage fast; about 60% of cases start unseen. You’ll protect your home, catch leaks early, and stay confidently in control.
Recap
When you spot ceiling water damage, you can’t wait. A faint stain can widen, sag, and darken like a warning light overhead. Stop the leak, dry the area, and check for mold or rot before hidden damage spreads. If the ceiling feels soft or the damage keeps returning, call pros fast. You protect your home’s structure, keep repair costs down, and prevent a small drip from becoming a costly collapse.