
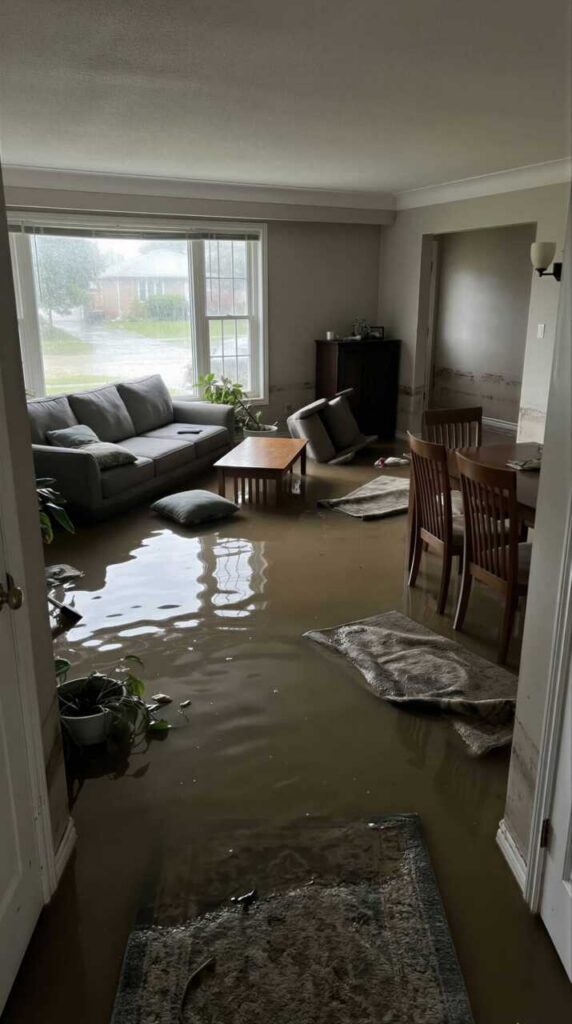
When floodwater hits your house, it spreads like a silent fault line beneath the surface. You need to assess the damage, shut off water and power, then remove standing water and debris before drying every affected area with fans and dehumidifiers. After that, check ceilings, insulation, and framing for hidden moisture, because mold can take hold fast—and knowing what to stabilize, patch, or leave to a pro can change everything.
Key Takeaways
- Document all flood damage with photos and notes before moving items or starting repairs.
- Shut off the main water supply and electricity if it is safe to do so.
- Remove standing water and debris quickly to reduce further damage and mold growth.
- Dry the area with fans and dehumidifiers, and replace soaked materials that cannot fully dry.
- Inspect for structural damage or mold, and call a professional for contaminated water or extensive repairs.
Assess the Damage in Your Flooded House
Before you start any cleanup, you need to assess the full extent of the flood damage in your house. Walk through each room and document every affected surface, fixture, and personal item. Use photos, video, and written notes to support your damage assessment.
Check walls, floors, insulation, cabinets, and baseboards for swelling, staining, or soft spots. Compare affected areas with unaffected ones so you can spot hidden moisture patterns. Keep a dated inventory of damaged belongings and separate salvageable items from ruined ones.
This record helps you stay organized and strengthens insurance claims. If you work carefully and methodically now, you’ll make smarter repair decisions later and feel more in control with your household team.
Shut Off Water and Power Fast
You should stop the main water supply first to limit additional flooding and reduce pressure on damaged lines.
Then cut electrical power at the breaker panel or main disconnect immediately if you can reach it safely.
If you can’t access these controls without entering standing water, stay clear and call emergency services or your utility company.
Stop Main Water Supply
First, shut off the main water supply and kill power to the affected areas if it’s safe to reach the service panel.
Locate the water supply valve, then turn it clockwise until it stops. If the valve sticks, use steady hand pressure, not force, to avoid breakage.
In homes with a meter box or curb-side emergency shutoff, find that control and close it fully.
Let everyone in your household know the supply is off so no one tests faucets or appliances.
Check that incoming water has stopped by listening for flow at fixtures.
Keep towels and a bucket nearby in case residual water drips.
You’re acting fast with your crew here, and that shared focus helps reduce damage, limit spread, and keep the space manageable.
Cut Electrical Power Immediately
If water has reached outlets, appliances, or the service panel, shut off electrical power at the main breaker only if you can reach it without stepping through standing water.
Then keep everyone out of the affected rooms and verify the area from a dry location. You need safety precautions before you touch any wet device, cord, or breaker box.
If the panel is already submerged, stay clear and call emergency contacts, including your utility company and a licensed electrician.
Use a flashlight, not candles, to check for sparks, heat, or buzzing. Label damaged circuits so no one restores power too soon.
Your team works faster when you follow one plan: isolate hazards, document damage, and wait for clearance before re-energizing the home.
Remove Standing Water and Debris
Start by pumping out or mopping up all standing water as quickly as possible to limit further damage and mold growth. Use a wet vacuum, sump pump, or buckets for fast water extraction, working room by room so you can track progress.
Wear boots and gloves, and keep pathways clear so your team can move safely and efficiently.
Next, collect ruined materials, mud, and loose debris into heavy-duty bags or bins for debris disposal. Sort salvageable items from unsalvageable ones, and label anything you need to inspect later.
Remove saturated rugs, cardboard, and small furnishings that trap contaminants. If you’re working with neighbors or helpers, assign one person to haul waste and another to check corners, closets, and under furniture so nothing gets missed.
Dry the Flooded House Thoroughly
You need to remove any remaining standing water before you start drying, since pooled moisture slows the recovery process and increases material damage.
Place fans to keep air moving across wet surfaces, and run dehumidifiers to pull moisture from the air and structure.
Keep both tools operating continuously until the house and hidden cavities feel dry and humidity readings drop to a safe level.
Remove Standing Water
Pump out standing water as soon as it’s safe to enter, because every hour of delay lets moisture spread into framing, drywall, insulation, and flooring.
Use water extraction techniques that match the depth and debris load: a wet vac for shallow pools, a submersible pump for deeper water, and buckets only for tight areas.
Work from the lowest point toward exits so you don’t trap more water behind you.
Watch for standing water hazards like hidden electrical damage, slick surfaces, and contaminated runoff.
Wear boots and gloves, and shut off power before you begin.
Check under appliances and inside closets, where water lingers.
Keep removing water until surfaces are visibly clear, then inspect for pockets you may have missed.
Use Fans And Dehumidifiers
Once the standing water is gone, move air across every affected surface with high-velocity fans and pull moisture out of the air with dehumidifiers. You’ll dry walls, floors, and framing faster when you create steady crossflow and keep humidity low.
Aim fans along baseboards, under cabinets, and through doorways so hidden cavities don’t stay damp. Place dehumidifiers in the wettest rooms, close doors when possible, and empty reservoirs or route drains continuously.
Check materials daily for cool, damp spots, and adjust ventilation techniques as needed. Use a moisture meter to confirm progress, because surface dryness can hide trapped water.
Good moisture control protects your repair work, reduces mold risk, and helps your household get back to normal with less stress.
Inspect Ceiling Water Damage
Start by checking the ceiling for sagging, discoloration, blistering paint, or active drips, since these signs often reveal trapped water above the surface.
You should document any ceiling leaks and map every water stains area with photos and notes.
Use a bright flashlight to inspect seams, corners, and fixtures, where moisture often spreads first.
Press lightly with a gloved hand to test for soft spots, but don’t puncture the material.
Listen for dripping inside cavities, and mark the perimeter of each affected section with painter’s tape.
If the ceiling feels unstable, stay clear and keep everyone in your home away from that zone.
A careful inspection helps your crew move together with confidence and reduces missed damage before repairs begin.
Repair Wet Drywall and Insulation
Cut out and remove any drywall and insulation that stayed wet after the flood, since trapped moisture can lead to mold and structural deterioration.
You’ll need to open the wall cavity far enough to inspect framing and other hidden materials for damage.
After the area is dry and clean, replace the insulation with new material that matches the wall assembly and local code requirements.
Remove Damaged Materials
Peel back waterlogged drywall and insulation as soon as you confirm the structure is safe, because trapped moisture can spread damage and feed mold growth.
Mark the wet zone, then cut drywall at least 12 inches above the visible stain with a utility knife or drywall saw.
Bag saturated insulation, baseboards, and trim immediately for material disposal, and keep debris separate from salvageable items.
Wear gloves, goggles, and an N95 or better, and keep your work area ventilated.
Wipe framing members clean so you can inspect for hidden decay and support mold prevention.
Work methodically room by room, and check cavities for lingering dampness.
If you stay organized and steady, you’ll protect the rest of the house and help your crew move forward together.
Replace Insulation Safely
Once the cavity is dry and the damaged drywall has been removed, you can replace the insulation with materials that match the wall assembly and local code.
Choose insulation types based on the space: fiberglass batts fit standard bays, while rigid foam can help where you need added moisture resistance.
Before you install anything, inspect framing for hidden stains or soft spots and correct them. If your wall includes moisture barriers, restore them in the same position and seal seams carefully.
Cut each piece to fit snugly, but don’t compress it, because that reduces performance.
Wear gloves, eye protection, and a mask, and keep the area ventilated.
You’re rebuilding a safe, comfortable wall system, so work methodically and verify every layer before you close it up.
Stop Mold Before It Spreads
As soon as you’ve removed standing water, dry every affected surface quickly because mold can start growing within 24 to 48 hours. You should open windows, run fans, and use dehumidifiers to pull humidity below 60 percent.
Remove soaked porous materials you can’t fully dry, then clean hard surfaces with detergent and water. Wear gloves and a respirator so you stay protected while you work alongside others restoring the space.
Focus on mold prevention strategies by inspecting hidden damp spots daily and logging any wet readings. Use moisture control techniques such as sealing small leaks, emptying drip trays, and increasing airflow around furniture.
If you smell mustiness or see spotting, act immediately. Quick, disciplined drying helps your home feel safe again and keeps your cleanup team moving forward.
Stabilize Ceilings and Framing
Before you move deeper into the room, inspect the ceiling and framing for sagging, cracks, bowing, or any sign that the structure has shifted.
If you see movement, keep everyone out and brace the area with temporary ceiling supports before you proceed. Use adjustable posts, 2×4 shoring, or cross bracing to redistribute load and limit collapse risk.
Work from stable ground, and place pads under each support so you don’t punch through flooring.
Follow proven framing techniques: align supports under joists, tighten them gradually, and check for deflection as you go.
If the damage is extensive, call a structural professional.
You’re not handling this alone; careful stabilization protects your home and gives your crew a safer space to keep working.
Patch and Repaint Ceilings
After you’ve stabilized the framing and confirmed the ceiling is safe, you can start repairing the surface damage. Cut away loose drywall, then square the opening so your patch fits cleanly.
Screw in backing strips, set new drywall, and tape the seams with joint compound. Feather each coat wider as it dries, then sand until the repair blends with the surrounding plane.
Match ceiling textures before you prime; test a small section so the finish feels consistent with the rest of the room.
Choose paint types that suit the existing coating, then apply primer and two thin finish coats with a roller. Keep your strokes even, and overlap edges while the paint is wet.
You’re restoring more than a surface—you’re bringing your space back together.
Know When to Call a Pro
When the damage goes beyond surface repairs, you should bring in a licensed restoration pro.
You need a professional assessment if water reached insulation, subflooring, wiring, or HVAC, or if you smell musty odors after drying. A pro can test moisture levels, map hidden damage, and decide whether demolition or antimicrobial treatment’s required.
Call emergency services if the flooding came from contaminated water, a gas leak, or any electrical hazard.
If walls stay damp after 48 hours, mold can spread fast and weaken materials. You’ll save time, avoid repeat failures, and protect your household when you let trained specialists handle structural drying and cleanup.
Ask for written scope, photos, and a clear timeline so you stay informed and connected through each step.
Frequently Asked Questions
How Soon Should Insurance Claims Be Filed After Flooding?
File your claim as soon as you can after flooding, ideally within 24 to 72 hours. Quick filing helps you start the claim process, protect flood insurance coverage, and join others who’ve documented losses promptly.
Can Flood-Damaged Appliances Ever Be Safely Reused?
Yes, you can sometimes reuse flood-damaged appliances, yet safety and ruin often sit side by side. You’ll need a certified inspection, electrical testing, and careful restoration options before you trust appliance safety again.
What Cleanup Supplies Are Best for Contaminated Floodwater?
For contaminated floodwater, you’ll need bleach, detergent, disinfectant wipes, heavy-duty gloves, N95s, boots, buckets, and absorbent towels. Follow safety precautions, prioritize mold prevention, and discard porous items you can’t thoroughly clean or sanitize.
How Do You Document Flood Damage for an Adjuster?
You document flood damage by creating a damage assessment, then taking dated photographic evidence of every affected area, item, and measurement. You’ll list losses, note moisture readings, and keep receipts for your adjuster.
Are Temporary Repairs Allowed Before Inspections Are Complete?
Yes, you can make temporary repairs before inspections finish, but you should follow inspection guidelines and document everything. You’ll protect your home, reduce loss, and stay aligned with your insurer’s expectations and your team’s recovery process.
Review
Flood damage can escalate fast: within 24 to 48 hours, mold can start growing on wet materials. If you act quickly, you can limit structural damage, protect indoor air quality, and cut repair costs. You’ve already seen the key steps: assess the damage, shut off utilities, remove water, dry thoroughly, and repair weakened areas. If the damage is widespread or mold has spread, don’t hesitate—call a qualified restoration professional.