
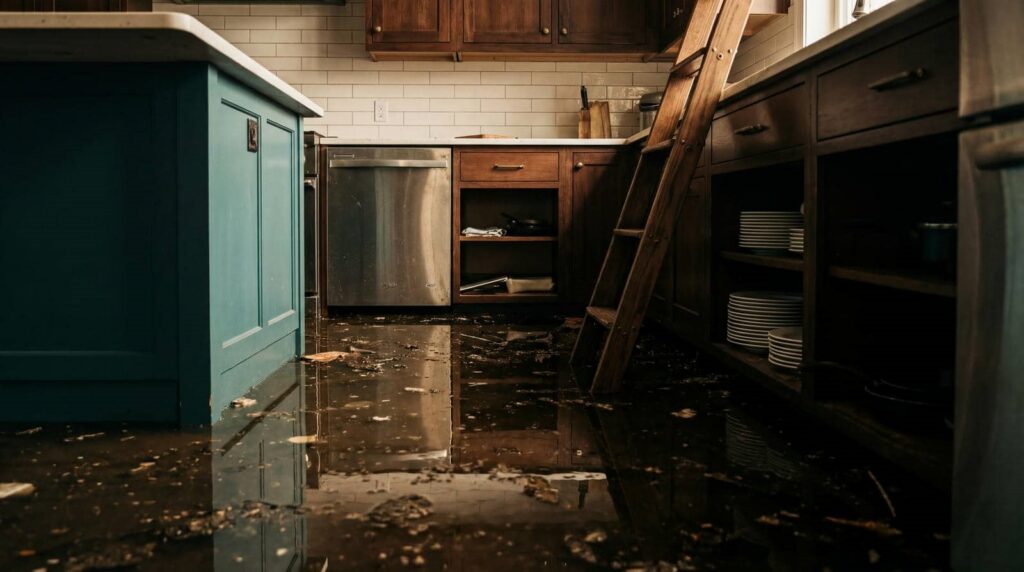
Floodwater can keep damaging a house long after the water recedes. Flooded house water mitigation is the immediate process you use to stop that damage, remove standing water, dry hidden moisture, and reduce mold and structural risk. You need to act fast, document losses, and assess affected materials before repairs begin. The critical question is how much damage is already hidden inside walls, floors, and insulation.
Key Takeaways
- Flooded house water mitigation is the immediate process of limiting damage after a flood by removing water and controlling moisture.
- It focuses on safety first, including stopping the water source and shutting off electricity if the area is accessible.
- Mitigation includes extracting standing water, removing soaked materials, and documenting damage for insurance.
- Drying with dehumidifiers and air movers helps prevent mold, structural decay, and hidden moisture problems.
- Professionals are needed when damage is extensive, contaminated, or affecting walls, insulation, subfloors, or electrical systems.
What Water Mitigation Means After a Flood
After a flood, water mitigation means taking immediate steps to limit further damage, remove standing water, and reduce the risk of mold, structural deterioration, and contamination.
You assess affected materials, control moisture, and stabilize the structure so flood damage doesn’t spread. This process often includes extracting water, drying assemblies, and documenting conditions for insurance claims.
You also identify porous items that may retain contamination and evaluate whether you can salvage them safely. Effective mitigation uses measured humidity, airflow, and dehumidification to restore acceptable conditions.
When you act quickly and methodically, you protect your home’s integrity and join others who’ve faced the same challenge with a clear plan.
Water mitigation isn’t repair yet; it’s the technical response that prepares your property for recovery.
What To Do First After Flooding
Start by making the area safe, then stop the source of water if you can do so without risk.
Turn off electricity to affected spaces only if you can reach the main disconnect without standing in water.
Wear boots, gloves, and eye protection as part of your safety precautions.
Contact your insurance provider and document visible damage with photos before disturbing anything.
Call an emergency response team if the flood involves sewage, chemicals, or structural damage.
Move people and pets to a dry, secure area, and keep everyone out of compromised rooms.
Open windows only when weather and conditions allow better ventilation.
Gather essential documents, medications, and chargers so your household can stay organized and supported while you coordinate the next steps.
Remove Standing Water And Debris
You should remove standing water as quickly as possible using a pump, wet vacuum, or other suitable extraction equipment.
Next, clear out debris, including soaked materials, damaged items, and loose contaminants, so you can access affected surfaces and reduce contamination risk.
This process helps you prepare the area for thorough drying and further mitigation.
Standing Water Removal
Standing water demands immediate removal because it quickly soaks structural materials, drives moisture deeper into finishes, and increases the risk of mold growth and contamination.
You should prioritize flood safety before you begin any water extraction, shutting off power to affected areas and wearing protective gear.
Use pumps, wet vacuums, or truck-mounted equipment to lower the water level as fast as possible, since every hour of delay increases absorption into framing, insulation, and flooring.
As you work, monitor moisture in hidden cavities and beneath surfaces so you can judge how much liquid remains.
Fast, controlled removal helps stabilize the space, reduces secondary damage, and prepares your home for the next drying phase.
When you act decisively, you protect both your property and your household.
Debris Cleanup Process
After the standing water is removed, clear out soaked debris, damaged materials, and loose contents so moisture doesn’t remain trapped in the structure.
You should sort debris types into salvageable items, porous materials, and contaminated waste, then bag or haul each group separately.
Use cleanup tools such as shovels, wet vacuums, scraper blades, and heavy-duty gloves to lift sludge, carpet padding, drywall, and insulation without spreading contamination.
Inspect hidden cavities, baseboards, and subfloors for residue, because trapped debris can slow drying and support mold growth.
You’ll work more efficiently when you remove materials in a controlled sequence and maintain clear pathways for airflow.
If you’re part of the cleanup team, document what you discard, since that record helps coordinate insurance, replacement, and restoration decisions.
Dry Walls, Floors, And Hidden Spaces
Dry out walls, floors, and hidden cavities as soon as standing water is removed to limit structural damage and mold growth.
You should remove baseboards, expose wall edges, and run air movers and dehumidifiers so moisture can escape from framing, subfloors, and insulation pockets.
Use moisture detection tools to track readings in drywall, trim, and flooring, since surface dryness can hide trapped water. If readings stay elevated, you’ll need targeted drying or drywall restoration to reopen wet sections and restore normal conditions.
Check closets, stair voids, and under cabinets, where airflow often stays weak. By monitoring these concealed areas carefully, you protect your home’s structure and stay connected to a thorough mitigation process that supports recovery.
Prevent Mold And Structural Damage
You need to stop mold growth by removing standing water quickly and keeping indoor humidity below 60%.
You should dry structural materials such as framing, subflooring, and insulation with controlled airflow and dehumidification to limit warping and decay.
You also have to remove hidden moisture in cavities, behind finishes, and under flooring to prevent long-term structural damage.
Stop Mold Growth
To stop mold growth, remove remaining moisture immediately and keep indoor humidity below 60% while damaged materials are still being assessed.
You should run dehumidifiers, increase air circulation, and monitor conditions with a hygrometer so your mold prevention efforts stay measurable. If you’re part of a restoration team, coordinate daily checks and document humidity control readings to verify the environment stays dry enough to suppress spores.
Seal off affected areas to limit cross-contamination, and discard porous items that can’t be sanitized. Clean hard surfaces with approved antimicrobial agents, then reinspect for hidden dampness behind baseboards, under cabinets, and inside wall cavities.
Acting quickly protects your home, reduces odor, and helps your household recover with confidence together.
Dry Structural Materials
Open wall cavities, subfloors, framing, and sheathing must be dried quickly to prevent mold colonization and further structural deterioration. You should match drying techniques to material types so you’re using the right method for each component in your home. Dense lumber needs steady airflow, while engineered panels respond better to dehumidification and controlled heat.
Position air movers to accelerate surface evaporation.
Run dehumidifiers to lower ambient humidity.
Monitor moisture levels until the structure returns to safe ranges.
When you dry structural materials promptly, you protect load-bearing assemblies, limit warping, and reduce the chance of hidden decay.
You’re not handling this alone; effective mitigation gives your space a safer path back to stability and keeps your home’s framework sound.
Remove Hidden Moisture
Hidden moisture can linger inside wall cavities, insulation, subflooring, and framing long after surface water disappears.
So you need to identify and dry concealed areas before mold starts to colonize and materials begin to deteriorate.
Use moisture detection tools, such as a pin meter or thermal imaging, to map damp zones and confirm drying progress.
Check baseboards, sill plates, and around openings for hidden leaks that can re-wet assemblies.
Remove wet insulation, open suspect cavities, and run targeted airflow with dehumidification until readings return to safe levels.
Keep monitoring for 48 to 72 hours, because trapped humidity can rebound.
When you document each step, you protect your home, support your crew, and reduce the risk of structural damage and costly remediation.
When To Call A Water Mitigation Company
How do you know when the damage has gone beyond what you can safely handle yourself? Call a water mitigation company when saturation reaches walls, subfloors, or insulation, because hidden moisture can spread fast and invite structural decay.
Their emergency response gives you immediate containment, extraction, and drying, while a professional assessment identifies contamination, demolition needs, and the proper equipment.
You should act quickly if you notice:
- Standing water after 24 hours
- Sewage, floodwater, or electrical hazards
- Warped materials, odors, or recurring dampness
When you bring in experts, you’re not admitting defeat; you’re protecting your home and joining a process built for recovery.
Timely mitigation lowers repair costs, reduces mold risk, and helps your space become safe and livable again.
Frequently Asked Questions
Does Homeowners Insurance Cover Flooded House Water Mitigation?
Usually, your homeowners insurance covers water damage from sudden internal events, not flood insurance losses. You’ll need separate flood insurance for storm-related flooding. Review your policy’s exclusions and deductibles, then document mitigation costs promptly.
How Long Does Water Mitigation Usually Take After Flooding?
Usually, you’ll see water mitigation take 3–7 days. About 14,000 people face water damage daily, so your restoration timeline depends on drying speed, contamination, and how fast you start professional extraction and monitoring.
Can I Stay in My Home During Water Mitigation?
You can stay home during water mitigation if crews isolate affected areas and you follow safety precautions, but strong odors, exposed materials, or mold may require temporary housing to protect your health and belongings.
What Equipment Do Mitigation Companies Use for Drying?
You’ll see air movers, LGR dehumidifier types, and moisture detection meters used to dry materials fast. They pull humidity, circulate air, and verify hidden dampness, so you’re protected and included in a safe recovery plan.
How Much Does Flooded House Water Mitigation Typically Cost?
You’ll typically pay $1,500–$8,000 for flooded house water mitigation, though flood damage extent, square footage, contamination, and drying needs drive cost factors. You’ll also feel more confident when pros document losses and stabilize materials.
Review
Flooded house water mitigation is your first line of defense after a flood, and timing matters: mold can begin growing in as little as 24 to 48 hours. You need to remove standing water, dry concealed spaces, and document damage before deterioration spreads. Acting quickly helps protect structural materials, reduce repair costs, and improve safety. When moisture has reached walls, floors, or hidden cavities, you should call a water mitigation company to control the damage effectively.